Sunday, 22 March 2020

Rooftop Gardening

When considering your gardening options look up.


There are always options and that is the approach that I take to gardening and most other aspects of my work and life. When it comes to gardening if you want to grow something green you can. Your desire and imagination will wake up the creative energy that is needed to overcome obstacles and enable you to design a garden to fit your space.

If you can’t grow in the ground, use containers or raised beds, if you have limited space think vertical.

One area that is often overlooked when planning a garden is the rooftop.

Now your house may not have a roof that suits a garden; it may be too slanted or does not have easy access for regular gardening chores.

It is important to make the distinction between a rooftop garden and a green roof, while there are some similarities, they generally serve different purposes.

Green Roofs:
Green roofs are a roof that allows plants, trees and shrubs to grow in a specially designed light-weight growing medium.

The three main types of green roof systems are:
  • complete systems where all the different components including roof membrane are an integral part of the whole system
  • modular systems that are positioned above the existing roofing system
  • pre-cultivated vegetation blankets that consist of growing medium and plants that are rolled onto the existing roofing system with drainage mats and root barriers as required
Rooftop Gardens
The rooftop garden is simply a garden, usually in containers, that is located on a rooftop. The rooftop may be a house, an office building, a garage, shed or any other structure that has a suitable surface and is strong enough to take the extra weight.
BE sure that the roof you choose can handle the extra weight, or you may get a major surprise. You may need to consult with a structural engineer before proceeding, remember that in addition to the garden, there will be at least one person adding to the overall weight.
If you are ready to proceed in the design of a rooftop garden the process that you are beginning is similar to combining interior decorating with landscape design.

Step One:
What is the purpose of the space? If you are looking to grow a container or two of herbs and vegetables that is one thing; if you are planning a community garden that is another.
Or, are you designing an outdoor space for relaxation and entertaining that incorporates flowers, shrubs and trees into the design?

It is possible to set up an orchard on the roof as long as the containers you use are big enough.

Step Two:
You know the space’s purpose; now what do you want to grow?

Step Three:
How much time do you want to devote to gardening? If your time is limited you may want to keep the garden element of the design small, you can always add later, enough so that you can give the plants the attention they deserve.
Be sure to make notes as you go; you will want to refer to them as you proceed.
What you do next will depend upon the answers to the questions raised in the first three steps. If you are adding an outdoor room to your home then you need to think about furniture, for example; if you are growing food, then all that is left to do is decide what food you want to grow.
Some considerations, the weather conditions on a rooftop, much like a balcony, will be different than those at ground level, there may be little to no shade so it will be hot and the winds will be stronger.
The combination of heat and strong winds means that the soil will dry faster than it will in the garden and therefore, the plants will need watering more frequently.
This brings us to another point, water overflow; containers can be designed to catch excess water so that it does not puddle on the roof, making for slippery conditions and added weight. I suggest you hand-water your rooftop garden so that you get sued to the plants’ needs and thus avoid excessive watering.
A rooftop garden is an ideal place to grow native perennials. They will be able to handle the ecosystem and you will be helping maintain the native plant population. This will also encourage native butterflies and birds to drop by for a visit.
Friday, 20 March 2020

Spring Renews

This was written a few years back but is still relevant.


There is a change in the air, the wind, although still strong is warmer, only slightly, but the difference is everything.
Spring is near, though the snow still lays heavy on the ground, little rivers of water slowly trickle from under the banks that have been here since late November.
Soon, another four weeks or so, the greening will begin and the first signs of Spring will appear. The crocuses and hyacinths are usually the first to appear, but I look forward to the dandelions which shout hello fro everywhere. The sighting of the first dandelion is heartening.
There will be cold days and nights and the remainder of winter will occasionally ride the wind, but the change has come.
One of the first signs of Spring’s arrival is the call of the white-throated sparrow, known by some Canadians as the Oh Canada bird as they hear the words Oh Canada, Canada, Canada in its call.
As a Canadian, I like that but what truly pleases me is knowing that the songbirds will soon return from their winter homes and spend awhile in my tree.
Their morning song will wake us but there are few better ways to begin a day. There are those who say that it is the birds’ morning song that wakes the sleeping flowers and calls them forth. I do not know the truth of this but it feels good to think of the relationship that way.
Each spring and fall, I watch the comings and going of plant and animal. Over an extended period of time if you observe Nature’s activities and the time of year they take place and what else is going on at that time you come to understand the ecosystem you inhabit and develop an awareness of the changes that may be taking place. This study is known as phenology.
Phenology  is the study of the timing of natural events. Common examples include the date that migrating birds return, the first flower dates for plants, and the date on which a lake freezes in the autumn or opens in the spring.
Phenological records help alert us about the events of nature and provide interesting comparisons between years and among different geographic regions. If recorded carefully and consistently, these records also have scientific value for understanding the interactions between organisms and their environment and for assessing the impacts of climate change.
Spring is indeed a time of renewal, a time of hope and a time to put into action all the plans that were made over the winter months when the outside was not ready. Now do not get me wrong, I enjoy winter and embrace the cold and snow but like all things, this too must pass and the arrival of Spring’s harbingers is a sign that the passing has occurred. Winter will return but not now, that is a future reality, for now, Nature is awakening and it is time to enjoy, observe and spend time with her.

Unfortunately, this year Spring will need to be enjoyed from my front deck and my garden. I am staying home due to Covid-19 and ask you to do the same.  Drop by this blog for videos t help you stay home and save live.


Tuesday, 17 March 2020

Bees, Butterflies, Birds


The three Bs, birds, bees and butterflies are a gardener’s good friends. If you make a few wise plants choices, refrain from engaging in chemical warfare and understand that Nature will provide what you need, then you are well on your way to creating a great garden; one that will provide the fruits, herbs, flowers and vegetables you seek to grow.
The plant choices you make need to be those that provide for the needs of the beings you wish to attract to your garden. Herbs are a great place to start and can be incorporated into a garden bed or arranged throughout your design.

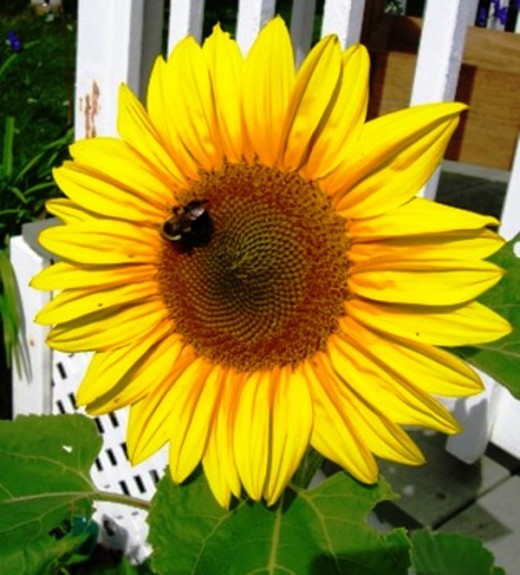
Bee and Sunflower

Bob Ewing photo
Bob Ewing photo

Plants


Dill and mint, for example, will bring the butterflies to your garden. Be sure to consider the whole butterfly family and choose plants that provide a place for the butterflies to lay their eggs. If you also provide them with a drink of water, they will hang around.
Sunflowers will attract all three, bees and butterflies first and then as the seeds develop the birds will drop by for their snack.
There are two things that butterflies are seeking: one is nectar, the food that adult butterflies need, and the other, host plants, the place where the female will lay her eggs and the food that caterpillars need. Both are necessary to create a successful butterfly garden.
Birds like seeds, nuts and berries so plants shrubs and native grasses to get their attention. Shrubs also provide them with shelter so they have a place to fly to when they feel the need, which can happen quite frequently in an urban backyard.
The plants you choose will do the job best when they are native to your area. The bees, birds and butterflies will recognize them and make a point to visit.
I suggest that if you are just getting started then take a trip to your local public library or talk to a naturalist society and find out what birds and butterflies are native to where you live and the plants they demand. Butterflies, especially, can be very fussy about what they eat and where they lat their eggs so get those facts first and then plant accordingly.
The three Bs, birds, bees and butterflies, provide the gardener with a number of services, pollination, pest control and beauty, for example. The plants required to make them feel at home in your garden are all plants that even the vegetable-only gardener can appreciate.

Monday, 16 March 2020

Native Plants

I am making changes to my garden, my small garden. Native plants, plants that are adapted to this region will play a more predominant role. I am a seed saver and plant breeder so will be saving seeds from these plants and possibly attempting a breeding program so the seeds can handle changing weather. Any advice and ideas are most welcome.

I live in Renfrew ON.

Thursday, 12 March 2020

Covid-19 and Your Garden

Will Covid-19 have any impact on how you garden this year? If yes, what changes will you make?

Friday, 6 March 2020

The Community Garden

One of the many aspects I like about living in Renfrew On. is its community garden. I am not a member because my osteoarthritis makes trips back and forth, difficult, but just knowing the garden is there is a feel-good reality.

If you want to garden and grow and maintain your own food, flowers or herbs but do not have a space suitable at home then a community garden can be the place where you can set your gardening passion free.
A community garden is a plot of land that is usually divided into subplots with each gardener having their own plot. You can grow herbs flowers or vegetables or a mix of all three.
There may be a communal plot where you grow corn or squash which is then shared.


Each gardener tends their own plot according to whatever rules the group has set.
For example, you may want to grow organically and in order to do this then all the gardeners would need to agree.
Terms such as whether the garden is organic or not are best set out in a contract which each gardener agrees to and signs before the season gets underway.
There may be communal workdays. Especially at the beginning and the ending of the season to take care of site preparation and clean up as well as putting the plots to bed for the season.
There may be chores that all share. When I was in Saint John, New Brunswick, for example, I belonged to a large community garden and there were chores such as cutting the lawn in the common areas and doing a bit of weeding and composting. Each gardener signed up for a shift.

Wednesday, 4 March 2020

First Short Road Trip

Tuesday we drove around the back roads of Renfrew County and along the Madawaska

Monday, 2 March 2020

How to Start a Vegetable Garden

How to start the vegetable garden

. There are three things that you must consider if the garden is to be successful; sun, soil and water. The garden will need six to eight hours of sunlight per day in order to produce vegetables or flowers.
Soil comes in three basic types, clay, sand or loan. The ideal soil is a sandy loam. There is a simple way to determine the type of soil in your garden. Pick up some soil with one hand, roll it into a ball. If it forms a ball that break apart readily it is loam. If a ball does not form, it is sand. If a ball forms but does not break apart easily, it is clay.
This primer will help you plan and design your first garden; it does not matter what you decide to grow, vegetables, flower, herbs or all three, the steps are the same.
Step One:
There are two questions you need to answer at this point.
1- What do you want to grow?
2- How much time to you have to garden, each day, and week?
It is important to match your schedule to your interests; you do not want to start a garden that is too big, as it is likely to become a burden and that will take all the fun out of the project.
It is equally important not to put in a garden that is too small as your yield, what you get back for your labour, will be smaller than you expected and you will be disappointed and perhaps discouraged.
Step Two:
Now is the time for the garden plan. Don’t panic, this is simple; a plan helps you stay on track, makes maximum use of your gardening time, is fun and can be changed whenever you desire.
You now know what you want to grow and how much time you are willing to commit to the growing and maintenance. Now you must determine:
1- Where will your garden grow? The backyard, most likely, but where, well for most cut flowers, herbs and vegetables you want a spot that gets full sun for 5-6 hours a day, minimum.
2- How big will it be? The size depends upon what you want to grow and how much. A good cut flower garden can be fairly small in feet 6x6 will do; same for a herb garden. Now unless you are prepared to convert your whole backyard into a vegetable garden and even then, you are not going to grow all the food your family needs, so pick you 3-5 favourite vegetables and focus on them.
3- Homework time. You need to know the plants you plant to grow, the public library can be a great source of information as can the Internet. You can also visit a local plant nursery and have a chat with the manager.
4- Put the right plant in the right place and it will thrive.
Read this hub, for details on building the garden bed. Speaking of reading, if you are planting seeds read the seed package. The information there is meant to be followed, so do so. If you are using plants then read the tag that should be in the pot with the plant, the same story; if it is, not then ask.
Gardening is a rewarding activity that does not have to be difficult or time-consuming, just be sure to build the garden that matches your needs, wants and schedule.
Consider keeping a journal. Record what you planted, how it fared and anything else that you notice. This information will be valuable when planning next year's garden.

Thursday, 27 February 2020

Annuals Can Add Value to the Garden

An annual plant is a plant that usually germinates, flowers and dies in one year. 
Some love annuals because they make excellent cut flowers; some because annuals are easy to grow; some love them for their brilliant colours while others just love to create a new garden every spring. 
The reasons do not matter as they are all sound; if you love to garden and enjoy bright vivid colours then annuals will satisfy your needs. I am very fond of annuals and cannot imagine a garden that does not have a few. 
They enlarge the palette but perhaps, more importantly, they enable me to make simple but noticeable changes to my garden and perhaps even better, they give me a reason to get out in the garden.

You can add annuals to your garden, throughout the growing season.

Annuals bloom continuously and produce prolific amounts of seed and this requires the production of many flowers; all making a win-win situation for any gardener.

The choice you have when selecting annuals is quite large so you will need a plan. The first step is to consider your climate, the soil and the amount of sunshine available. Now if you have been gardening for some time, you will have these answers. So the next step is to answer this question; what function will the annuals serve? Are you creating a cutting bed or adding a splash of colour to the border.

Annuals not only come in many different colours but heights and their foliage will have different textures and shades so if you have an existing garden and want to add some annuals to your perennial border make sure what you add is a comfortable fit with what is already there.

When you visit the plant centre you may become overwhelmed by the rows of annuals stretched out before you so get a plan before you go. Let's take a look at one of m favourite annuals the cosmos.

Cosmos:


The cosmos is a rapidly growing plant with delicate and graceful flowers. They will grow to between 4 and 6 feet tall. Some years back we had cosmos planted across the front edge of the front yard, creating a lace-like fence between our yard and the sidewalk.

Cosmos will grow well in full sun in most soils. You can start them indoors five to six weeks before the last frost date or you can sow them directly after the danger of frost has passed. The plants should be 12 inches apart and the seedlings will transplant easily. If the location is very windy you may need to stake them.

Monday, 17 February 2020

Worm Composting

An indoor worm composting bin will turn your kitchen scraps into odour free nutrient-rich organic material that you can use in your garden or in small amounts add now and then to your houseplants.
You can buy a ready-made composter or build one. To build your own you will need, a worm box, redworms, bedding material and kitchen scraps.
Worm box:
You can use a wooden or plastic garbage can or storage box. Be sure to drill 3 holes (1/4”) in the bottom for drainage. As the worms eat your garbage, moisture is produced so you will need to place a container to catch this liquid, or one morning you will find an unpleasant puddle needing your attention.
This liquid is great for your houseplants so do not toss it away.
Cover the drainage holes with small rocks or gravel, about one inch of gravel at the bottom of the box will do the trick. Cover the gravel with a screen.
Moisten the bedding material. This can be shredded leaves, sawdust, newspapers or peat moss and fill the box about 2/3 full. You can add a ½ cup of finished compost to speed the process along at this point, if you wish.
Now it is time to add the worms which you can order from a number of sources. Red worms are what you need not earthworms. There are a number of good online red worm suppliers out there, and if you do not want to build your own composter they can sell you worms and worm bins.
Cucumber peel, melon rinds, lettuce and coffee grounds are favourite foods.
IMPORTANT: Be sure to bury the scraps in the bedding in order to avid attracting fruit flies.
Over time the bedding will disappear, and the box will become full of worm castings. You can harvest the casting by placing fresh bedding and fresh scraps in just one spot, and when the worms move in you can remove some of the castings, which you can then use on your houseplants or out in your garden.
Be sure to keep the worm box 2/3 full and your worms and your plants will be very happy.

Tuesday, 11 February 2020

Small Space Gardening

Small spaces may present some gardening challenges but with a bit of planning and careful thought, you can create a great garden in the tiniest of places. Be it backyard, balcony, or rooftop, the space can be transformed into a green oasis.
To get started ask yourself the following questions:
  1. How do you currently use the space? Is it a quiet getaway; a place for you children to play, or pets to roam, for entertaining?
  2. What do you want to grow, herbs, flowers, annuals, perennials, shrubs, fruit trees, vegetables?
  3. Thinking about a water feature?
  4. Do you use it as an outdoor office?
Once you have answered these questions, here are a few more to ponder.
  1. How much money are you willing to spend, on hardscaping, plants, watering system and décor, lights, garden art?
  2. How much time do you have to look after your garden?
  3. What specific challenges do you need to address, sunlight blocked by nearby buildings for example, ugly view?
  4. Measure the space and draw a plan. You do not need to be an artist but setting in down on paper will help you focus.

You are now ready to create your garden plan, and, of course, there are more questions.

  1. Are you growing in containers? If so, you need to select containers that are the appropriate size for the plants you choose and fit in with your overall décor.
  2. Is there a view you which to hide? If yes, then you may want to include a trellis and a climbing plant such as English ivy or you could consider ornamental grasses; it depends upon the situation.
  3. Do you want to add lighting, furniture, garden art? If you do they must flow with the design.
  4. Think up, small spaces are ideal for growing vertically; you can use trellises and other supports or stackable plant holders for herbs, for example.
  5. Fill in all the items that will be in your garden on the plan, again, accurate representation is not the goal, only you need to be able to understand it. Label items, such as a chair, light rose, peas.

We grow beans and peas vertically so why not expand that list. When you make the choice to grow vertical your small space expands, growing up means growing more.

Look to miniature varieties when selecting plants, the popularity of container and balcony gardening has lead to the development of a number of plants that work very well in a small space.

Above all, have fun; this is your space, design it your way.

Saturday, 1 February 2020

Planting Bulbs in Brief

Remember right plant right place will help you grow beautiful flowers. Most spring-flowering bulbs will need a highly organic, well-drained, slightly acidic (pH 6-7) soil in a sunny location(6 to 8 hours of sunlight.)
When it comes to planting bulbs there is a second rule in addition to the right plant, right place rule and that is to plant bulbs root side down. If you do not you will be wondering where the bulbs are.
You plant spring bulbs two to three times as deep as the bulbs are tall. For example, two of the most popular plants tulips and daffodils will be planted approximately eight inches deep. Smaller bulbs, such as crocus and snowdrops (Galanthus) will be planted three to four inches deep.
You measure the planting depth from the bottom of the bulb; this applies to spring bulbs.
To plant you will dig and loosen the entire bed (where the bulbs will go) to the proper depth.
Next, you plant the bulbs into the soil in the bed and press them down and cover with soil. Do not press too hard you do not want to compact the soil.
This process is a faster means of getting your bulbs planted than using a bulb planter to do them one by one. Although, the one at a time method can be useful if you are only adding a few bulbs to an already existing bed or another spot where you need a bit of early colour.
Once the bulbs are planted, water them. This will provide the moisture that the bulbs need to start the rooting process and will assist the soil to settle.
If you are planting bulbs in the fall, they will need to root before the weather gets too cold. It is vital that you do not overwater in the fall as the bulbs may rot and once again you will be wondering where the bulbs come up in spring.
When you first see the flower buds appear it is time to water as long as the soil is dry.
You must water, when it is time, deeply. The bulbs can be planted six to eight inches below the ground and you want the water to reach them.
A soaker hose is an efficient way to make sure that your bulbs get the water they need so that they can produce the brilliant colours that you are eager to see at winter’s end and as spring blossoms.